How to care for a print

How to care for a print

Congrats! You purchased a beautiful print – maybe it’s for your new home, to celebrate a milestone, or because you fell in love with the image and had to have it (I know the feeling!). Life is good and you can’t wait to have it on your wall.
I would recommend you bring the print, still in its unopened tube, straight to a framer when you get it. This will ensure it is properly manipulated right from the start.

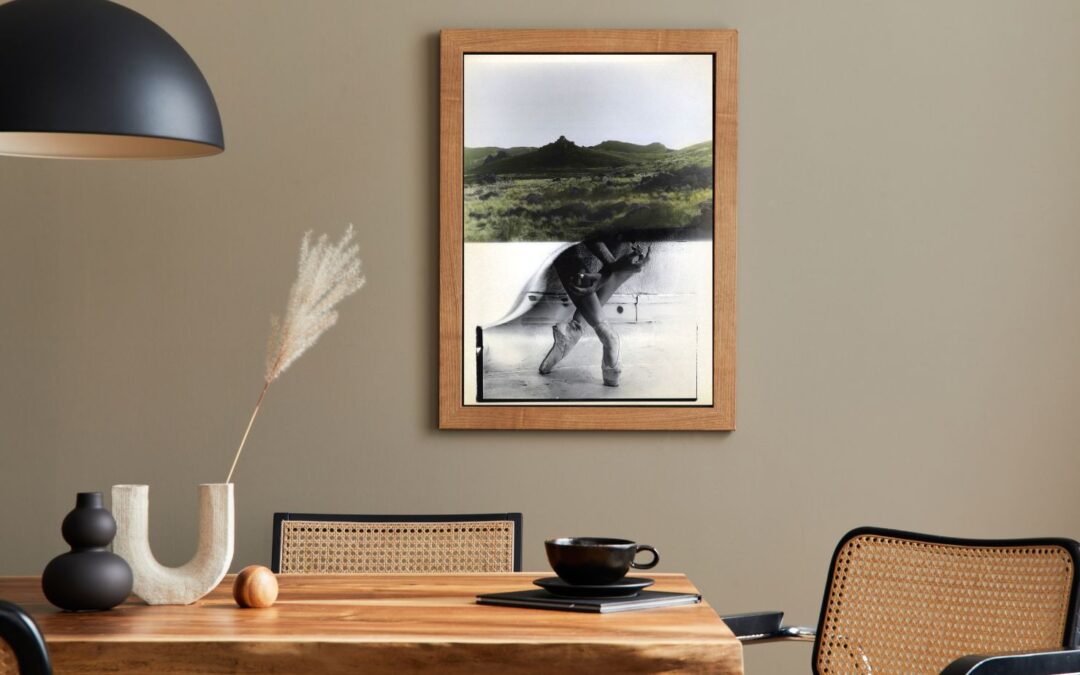
Taking into account human nature, the most realistic thing that will happen is that you will open the tube and unroll your print yourself – no judgment here, everyone loves opening presents! If you do, please be mindful when manipulating the print and wear soft cotton gloves. You might feel silly doing so but gloves are a must to avoid leaving marks, scratches or fingerprints.

Bring it to a framer as soon as you can. Don’t keep your print rolled up in its tube for too long as it can damage it over time. Besides, art should be seen and enjoyed!

Print of a woman on a sailboat, leaning on a low table in a living room
A woman on a foggy beach holds seaweed to hide her face
One of my pet peeves is seeing reflection or glare when looking at art. Here I am, trying to enjoy something beautiful only to have it ruined by the glare from a nearby light, or my own reflection looking back at me. It seriously drives me bonkers!

Museum glass (or museum plexiglass) offers the ultimate protection against UV while having no reflection or glare (I don’t know how they do that, it’s magic!). It’s more expensive than regular glass/plexiglass but infinitely better (at least, for people who share my pet peeve).

Large print of a sunset hanging above a bed
PRO TIP #1: Placement is important in protecting your print in the long run. You should avoid placing it in direct sunlight (think, facing a window), heat (above a radiator or working fireplace), or humidity (in a bathroom or on a covered patio).

PRO TIP #2: Finally, dust it when needed. Simply use a soft cloth and computer screen cleaner to wipe the front of the frame and glass and enjoy your art for years to come.

If you missed it, read about how to choose the right size for your print(s) here. And find advice on how to hang them here.


There you have it! Tag us on social so we can see how your print looks in your home. Cheers!

#AureliesGallery and @aurelies_gallery

How to hang a print

How to hang a print

You now have defined the perfect spot for your print and know which size you need for it… But read on to know how to hang a print before grabbing that hammer!

If you have a good spatial sense and are handy, you could wing it. I wouldn’t recommend it if you’re creating a gallery wall (or even need to align two prints together), but if it’s only one print and you’re feeling confident and know what your wall is made of (plaster, sheetrock, bricks..), go for it! Just remember the art should cover two-thirds to three-fourth of your available wall space or width of the furniture piece.

For anyone else, here are some tips to keep in mind.

If the print is the centerpiece on a blank wall (think, in a hallway or corner of a room), aim to hang it so its center falls at eye level (between 56 and 60” from the floor). Even if you’re tall, don’t hang the art so high people can’t easily appreciate it!

If the print is going above a piece of furniture, hang it between 4 and 12” above the top of the couch, headboard, fireplace mantel, etc.. This will ensure the artwork has some breathing room. This rule also works for hanging a large print on a blank wall behind a dining room table (or other).

If the print is part of a large gallery wall, you can create a grid if all the pieces are of the same size. Or you can cluster different artworks in a more organic way. Do some research online to see which style suits you best – there’s no wrong answer here!

Once you have mapped out how big and tall your gallery wall will be, treat it as one unit:

  • If it’s going on a blank wall, make sure its center is at eye level (56 to 60” off the floor).
  • If it’s going above a piece of furniture, place the lowest pieces 4 to 12” above it.
Reading nook with a chair and a print on the wall behind it
Print of a house hanging about a console table
If the print is with 1 or 2 other artworks, you have 2 options:

  • If all the pieces are the same size, you should line them up to create symmetry. You can go either vertically or horizontally, depending on your wall space. Keep them 3 to 4” apart.
  • When the artworks are of different sizes, have fun with how you place them. Just make sure their middle points line up to bring some order to the grouping, and keep them 3 to 4” apart.

Treat the grouping as one unit, make sure its center falls at eye level and / or it’s 4 to 12” above a furniture piece.

If the prints are running along a staircase, some planning is needed, like for any other gallery wall:

  • Come up with an order for all the different pieces. You could start with small prints, go bigger in the middle of the staircase, and end again with small pieces. Or you could alternate 1 larger print with 2 smaller ones… Look for inspiration online and take the time to map things out.
  • Draw in pencil or with painter’s tape a straight line that runs parallel to the stair. The line marks the center of the larger prints, with the smaller pieces placed next to them.
  • Hang a piece every 2 to 3 steps to get a diagonal look.

(Stating the obvious here, but make sure your staircase is wide enough so your prints won’t get knocked down every time you’re rushing out the door!)


Two photo of a black horse hang above a black buffet
PRO TIP #1: Marking on your wall not only where the nails will go but the outline of the framed print(s) really helps visualize how things will look. I find pencil too faint for me and use painter’s tape. Some people cut out mockups in craft paper and arrange them on the floor or tape them to the wall – do whatever works for you.

PRO TIP #2: If you have low ceilings (below 8 feet), separate your wall into 4 sections and hang your artwork in the third section (from the bottom up). Not too high, not too low, just right! (channel your inner Goldilocks!)

BONUS: If after reading all this you’re overwhelmed, fear not – here are a few ideas on how to display your art without ruler, pencil and hammer:

On a picture ledge shelf. This is currently my favorite option and I cannot wait to implement it in my place. You can switch artworks without having to worry about putting new hooks and nails on your walls. It’s a minimalist setup that gives you the versatility of a movable gallery wall. What’s not to love?

On a floating shelf or a bookshelf. Add decorative elements (books, souvenirs, plants) of varying heights around the print and have fun with it! Easy to swap things around when your space needs a refresh. But make sure the print is secured and cannot slip and crash on the floor (which happened to me not once but TWICE! Needless to say, I don’t recommend the experience).

Casually leaned against the wall. On the floor near your bed, on top of your buffet in the dining room… this option is like the cool kid we all wanted to be in school – nonchalant, not even trying, and yet perfectly put together! (just make sure the print can’t slip!)

Small print of a building facade, placed on a shelf
Small print of a building facade on a shelf
Framed print of a modern building facade, leaning on bench in an entryway
Read about how to choose the right size for your print(s) here. And find advice on how to care for them here.


There you have it, dear reader. Now tag us on social so we can see how your print looks in your home. Cheers!

#AureliesGallery and @aurelies_gallery

How to choose the right size art for a wall

How to choose the right size art for a wall

You fell in love with one of our photographs (congrats, you have excellent taste!) and now need to figure out which size will work best for your place.
Take the time to really look at your space to determine where the print will go. Is it above your bed or couch? In the corner of your home office, or part of an already existing gallery wall? Once you know the spot, it’s time to break out the ruler and do some math (oh, joy!).

Keep in mind the orientation of your artwork. Horizontal format will look better over a couch or bed, while vertical format is ideal for narrow walls.

Measure the space and decide then on the type of artwork you’re planning on buying. A good rule of thumb is to aim to fill about two-thirds to three-fourths of your available wall space (or furniture piece’s width).

HERE ARE THE MAIN SIZE OPTIONS:

Small Wall Art is between 18 and 24” in height or width. This size is ideal for:

– smaller spaces (like a reading nook, a short hallway, or the corner of a room…),

– placed on a floating shelf (or bookshelf) with other decorative elements,

– grouped with other artworks (you can either go for a full-on maximalist gallery wall to create an impactful accent wall, or play on symmetry and use only two or three pieces).

Print of a photo of Mont Saint michel above a small table in an entryway
Medium Wall Art is defined as being 25 to 32” (2 to 3 feet) in height or width. This size is big enough to pack some visual punch, while not being overwhelming and adding visual clutter to your space. It works well for:

– most city apartments, which are never that big, unless you’re among the lucky ones to have a loft with high ceilings and lots of wall space,

– placed by itself above a couch or bed,

– paired with a similar-sized artwork to create symmetry and double the impact (depending on your space, don’t forget you could place them vertically, which is a great alternative to the traditional horizontal setup).

Photo print of a black horse’s profile, photographed against a black background, hanging in a living room
Large Wall Art is anywhere between 33 and 40” (2.5 to 4 feet) in height or width. A print this size will act as the main focal point in any room:

– don’t try grouping it with other artworks as it will dwarf them,

– let it breathe. Make sure there’s enough negative space around it so it doesn’t end up looking crowded and cramped.

Oversized Wall Art is anything bigger than 40” (4 feet) in height or width. Perfect for a loft in SoHo or Downtown LA, or a manor in the British countryside! Kidding aside, a XL print will bring a major wow factor to your place.

FYI: we will happily work with you to create a custom piece for your space. Simply contact us!

Large framed print of a Mouse pad with a photograph of a shaded and flowery spot in a park, hanging in an all-white bedroom
PRO TIP #1: Don’t forget to take into account that framing and matting will add a few inches to your piece.

You can give more oomph to a small artwork by using a wide matte around it (just don’t go crazy or it will look off-balanced). And you can minimize a print by bypassing the matte and choosing a thin frame.

PRO TIP #2: When in doubt, go with the bigger print size. An artwork that is too small will look disconnected from the rest of the room – and that’s never a good look!

If the print is a little too big, a thin frame will help. And you can move around your furniture or decorative elements to make it work. Where there’s a will, there’s a way!

Large print of a aerial landscape in a living room
TIME TO TAKE SOME MEASURES!

Note: These calculations work for both individual pieces and groupings / gallery walls.

For a print going on a blank wall, measure the height and length of your wall.

Multiply the height by 0.57 and again by 0.75 to get the range in which the ideal height of your print needs to be. Do the same for the length to get the ideal width options for your piece.

Your artwork (including frame) needs to cover 2/3 to 3/4 of space.

For a print going above a piece of furniture, multiply its width by 0.57 and 0.75. The results are the range in which your artwork measurement needs to fall to properly complement the space.

For example, if your sofa is 84” wide, your framed print should be between 47 and 63” wide.

If your headboard is 60” wide, your framed print will ideally be between 40 and 45” wide.

(This again follows the general rule that your framed print needs to needs to cover 2/3 to 3/4 of your space.)

MY TWO CENTS:

Although it’s good to know the rules, it’s also fun to break them once in a while!

Placing a small-size artwork in a bedroom, next to one of the bedside tables for instance, or above the chair where you drop your clothes at the end of the day, can create an unexpected and delightful vignette.

Alternatively, you could go big and have one large print in your studio apartment to create a strong statement. It’s your place – do as you please!


Next, how to hang your print!